Looking Glass Documentation
Buy Looking GlassDiscord
  • Looking Glass User Guide
  • NEW! โœจLooking Glass Goโœจ
  • Displays
    • ๐Ÿ”ฎLooking Glass Go
      • โšกGet Started with Looking Glass Go
      • ๐Ÿ“ฑUsing the Go Mobile App
      • ๐Ÿ”†Liteformsโ„ข
      • ๐Ÿ–ฅ๏ธStandalone and Desktop Modes
      • ๐Ÿ”ŒPower and LED States
      • ๐Ÿช„Default Playlist
      • โญ๏ธWhat's Next?
      • ๐Ÿ‘œAccessories
      • โš™๏ธAdvanced Playlist Creation
      • โš™๏ธManual Firmware Update
      • โ“Common Troubleshooting Issues
    • ๐Ÿ”ฎLooking Glass 16" Light Field Displays
      • ๐Ÿช„Looking Glass 16" Light Field Display (Landscape)
      • ๐Ÿช„Looking Glass 16" Light Field Display (Portrait)
      • โ“Common Troubleshooting Issues
    • ๐Ÿ”ฎLooking Glass 32" Light Field Displays
      • ๐Ÿช„Looking Glass 32" Light Field Display (Landscape)
      • ๐Ÿช„Looking Glass 32" Light Field Display (Portrait)
      • โ“Common Troubleshooting Issues
    • ๐Ÿ”ฎLooking Glass 65" Light Field Display
    • ๐Ÿ”ฎLooking Glass Portrait
      • โšกGet Started with Looking Glass Portrait
      • ๐ŸŽ‡Demo Holograms
      • โ“Common Troubleshooting Issues
  • Software Tools
    • ๐Ÿ“šOverview
    • ๐ŸŒ‰Looking Glass Bridge
      • โœจUsing Looking Glass Bridge
      • ๐ŸชŸDisplay Settings on Windows
      • ๐ŸŽDisplay Settings on macOS
      • ๐ŸงDisplay Settings on Linux
      • ๐Ÿ‘ทTroubleshooting
    • ๐Ÿ“ฝ๏ธLooking Glass Studio
      • ๐Ÿ“šUsing Looking Glass Studio
      • RGB-D Photo / Video
      • Quilt Images / Video
      • iPhone Portrait Photos
      • Android Depth Photos
        • Samsung Portrait Mode
      • Light Field Photosets
      • Exporting Holograms
      • Troubleshooting
    • ๐ŸงŠLooking Glass Blocks
      • โœจConvert any image into a hologram
      • โฌ†๏ธUploading, editing and sharing Quilts
      • ๐ŸฅฝViewing your holograms on different platforms
    • ๐ŸŽฌHologram Video
    • ๐Ÿ”†Liteformsโ„ข
      • ๐ŸชŸGet Started on Windows
      • ๐ŸŽGet Started on MacOS
      • ๐Ÿง™Making Custom Liteforms
      • ๐ŸชConfigure Liteforms for Kiosk Setup
    • ๐Ÿ‘€Looking Glass Model Viewer
    • ๐ŸงชExperiments
      • ๐Ÿ“ฝ๏ธMedia Encoder
      • โฉLooking Glass Media Encoder
  • Key Concepts
    • ๐Ÿ”‘Hologram 101
      • ๐ŸŽ‰Making great holograms
      • ๐ŸŒŽHolograms in the real world
      • ๐Ÿ‘พHolograms, but virtual
    • ๐Ÿ”How does Looking Glass Work?
    • ๐Ÿ“ธVirtual Camera
    • ๐ŸงŠ3D Design Guidelines
      • Lighting
      • Post-Processing
      • Scene Composition
      • Materials & Textures
      • Performance
    • ๐Ÿ’กQuilts
      • ๐ŸŽฌQuilt Video Encoding
    • ๐Ÿ’กLight Fields
      • โšกLinear Light Field Capture
    • ๐Ÿ“ฝ๏ธFilming a Looking Glass
  • Creator Tools
    • ๐ŸŽจOverview
    • ๐Ÿ”ŒUnity
      • โšกUsing Unity with Looking Glass
      • Setting up your Development Environment
      • Example Scenes
      • Prefabs
        • Hologram Camera
        • 3D Cursor
        • Dual Monitor Application
      • Script Reference
        • HologramCamera.cs
        • LKGDisplaySystem.cs
        • QuiltCapture.cs
        • Cursor3D.cs
        • OrbitControls.cs
        • BlockUploader.cs
        • MobileDMAController.cs
        • iOS Sample Scene Scripts
          • ChangeInteractionModality.cs
          • XYSlider.cs
          • XYSpotlight.cs
          • AudioRotateControl.cs
          • ModelController.cs
          • DemoIOSUIController.cs
          • PageHandler.cs
          • PageConnectHandler.cs
          • PageCalibrateHandler.cs
          • PageTestHandler.cs
          • DynamicAlcove.cs
      • Package Integrations
        • Built-in Render Pipeline Post-Processing
      • Developing for iOS
      • Depth of Field and Other Post-Processing Effects
      • Quilt Video Audio and Playback
      • Developing for Ultraleap Hand Tracking on Looking Glass
      • Looking Glass Pro (Legacy)
      • Additional Support
      • Change Log
    • ๐ŸนBlender
    • ๐Ÿ”ŒUnreal Engine
      • ๐Ÿ—’๏ธChange Log and Old Versions
      • ๐Ÿ’ฝInstalling the Unreal Engine plugin
      • ๐ŸŽฅUsing the Unreal Engine Plugin
        • Using the HoloPlay Capture
        • Exporting Quilt Images and Video with Sequencer
      • Accessing HoloPlay Data with Blueprint Scripting
      • Packaging the Project
      • Unreal Engine 4 (Legacy Support)
        • Unreal Engine 4 Quick Start
          • Using the HoloPlay Capture
          • Exporting Quilt Images and Video with Sequencer
    • ๐ŸŒWebXR
      • ๐Ÿ”ถPlayCanvas
      • 3๏ธโƒฃ3๏ธโƒฃ Three.JS
      • โš›๏ธReact-Three-Fiber
      • ๐ŸŒˆSpline
  • Tutorials
    • ๐Ÿ“ฑRunning Looking Glass Displays with iOS Devices
    • โ“‚๏ธCapturing Light Fields in Maya
    • ๐Ÿง‘โ€๐Ÿ”ฌUsing ShaderToy with Looking Glass
    • ๐ŸŽจSculpting with Adobe Medium and Looking Glass
    • ๐Ÿ”Turn Videogames Holographic with Refract
    • ๐Ÿ–๏ธBuilding with Leap Motion
  • Developer Docs
    • โš™๏ธLooking Glass Bridge SDK
      • ๐Ÿช›Web Application Integration
      • ๐Ÿ”ŒIntegrating Native Applications
      • ๐Ÿ““Native Function Reference
    • ๐ŸฆLooking Glass Core Migration Guide
  • Third Party Software
    • ๐Ÿ—ก๏ธ3D Slicer
    • ๐Ÿ”ฌVTK (Visualization Toolkit)
    • ๐Ÿ—บ๏ธParaView
    • ๐Ÿ”ฉCommunity Made Tools & Projects
  • Legacy Software
    • ๐Ÿ“ก3D Model Importer
      • 3D Model Importer App Guide
      • 3D Model Importer App Reference
    • ๐ŸŽญDiorama
      • Change Log
    • ๐ŸŽž๏ธDepth Recorder
    • ๐Ÿ“ธLightfield Photo App
    • ๐ŸLooking Glass Core Overview
    • ๐Ÿฝ๏ธLooking Glass Core SDK
      • C API Overview
        • HoloPlayCore.h
          • State Functions
          • General-Query-Functions
          • Device-Query-Functions
        • libHoloPlayCore.h
        • HoloPlayShaders.h
    • ๐Ÿ”ฐLooking Glass Core JS
      • API
        • HoloPlayCore.Client
        • HoloPlayCore.Message
        • HoloPlay Service Related
        • examples
  • Legacy Hardware
    • ๐Ÿ”ปLooking Glass 8.9"
    • ๐Ÿ”ปLooking Glass 15.6"
    • ๐Ÿ”ปLooking Glass 8K
    • ๐Ÿ”ปLooking Glass 16"
    • ๐Ÿ”ปLooking Glass 32"
    • ๐Ÿ”ปLooking Glass Pro
  • ๐Ÿ’ฌContact Us
  • ๐Ÿ› ๏ธFAQ & Troubleshooting
Powered by GitBook

Follow us

  • Twitter
  • Instagram
  • LinkedIn
On this page
  • Requirements
  • Introduction
  • Steps
  • We're always excited to see what you're making!

Was this helpful?

  1. Creator Tools
  2. Unity

Using Unity with Looking Glass

PreviousUnityNextSetting up your Development Environment

Last updated 4 months ago

Was this helpful?

Requirements

Introduction

Using the Looking Glass Unity Plugin is a very seamless way to add onto your existing Unity development workflow, whether you're an expert or a beginner. You can check out the tutorial video or follow the written steps below (or both!) to get started right away!

Steps

1. Importing the Looking Glass Unity Package

Set your Looking Glass Display to Desktop Mode and import the Looking Glass Unity plugin into a New Project in Unity by either double clicking on the package in your downloads folder or importing the asset within Unity via Assets > Import Package > Custom Package.

That's it! You're ready to get started with your first Unity hologram!

2. Framing Content with Hologram Camera

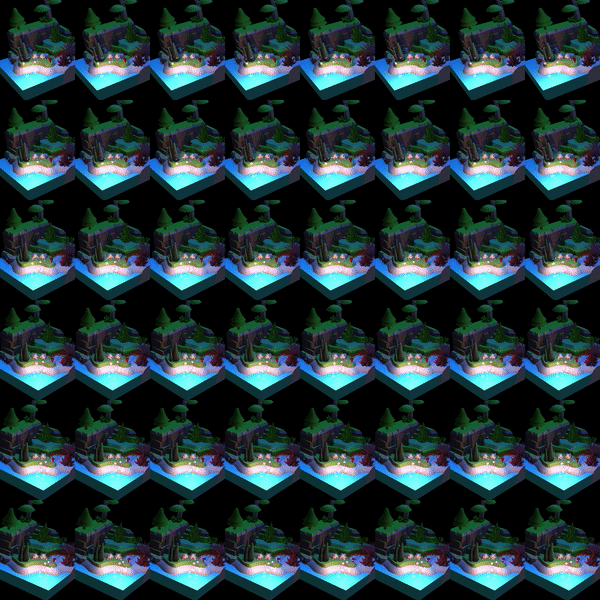
Let's open up the first example scene in the package "Framing Content with Hologram Camera". This example demo scene should show a little island with two cute furry creatures.

Navigate to the Hologram Camera in the Hierarchy and then select "Cast to Looking Glass" (or ctrl + e) in the Inspector to view your scene in the capture box in your connected Looking Glass display.

Let's go over a few basics: The Hologram Camera is pretty similar to the Unity standard camera, but there are a few things are different. โ€ Namely, it's a box. The pink square in the center of this box is the point of focus in the Capture Box and thus the connected Looking Glass Display. โ€ If we move the capture box back and forth, you can see wherever the square is becoming the clearest focal point in the scene.

In v2.0 of the plugin, we introduced a new "Transform Mode" called "Camera" which makes the hologram camera behave much more like a standard camera. The rest of this tutorial, however, will focus on the "Transform Mode" of "Volume" where the hologram camera operates like a volume of space, anything inside of which shows as a hologram on your connected Looking Glass.

3. Adjusting position, rotation, scale and FOV

Select the DEMO object in the example scene's hierarchy. Let's check out the cool script that, in play mode, allows you to see animations of position, scale, rotation, clipping plane, and FOV of the Hologram Camera. Hit play and go through each selection to see what changing each does for your Looking Glass view.

While this DemoCaptureAnimator script is an example of ways you can animate these values in script, you don't have to do that. In Camera Properties on the Hologram Camera, you can change these settings manually.

4. Adding interactions! Easily interact with your Unity Holographic scene

Go to the prefabs folder of the Looking Glass Plugin and add the 3D Cursor prefab to your scene. The 3D Cursor is a great component that allows you to easily maneuver your scene with your mouse cursor in play mode.

Once you've got the 3D Cursor added, go to the Hologram Camera and Add Component โ†’ Orbit Control to your camera.

Now that you've got the 3D Cursor setup you can try it out in play mode with the following controls!

  • left click + drag to rotate the scene,

  • scroll up and down to zoom in and out of the scene,

  • scroll wheel down and mouse drag to pan the scene around

  • double click any point of the model to focus the view at that point

Pull in your own models into the scene and interact with them with the 3D Cursor and Orbit Controls.

5. 3D Screenshot your scene as a quilt

You can even use the next component, "Blocks Upload," to directly save holograms to your Blocks account from within Unity!

6. Recording your scene with Quilt Capture

Another amazing feature in our Unity plugin is the ability to record quilt videos of your 3D scenes and save them in Looking Glass Studio or share them with others.

For this, too, you can use the Quilt Capture component on the Hologram Camera. It has a number of settings to help you record the ideal footage.

  • Manual: press buttons in the editor to start, pause, and stop a capture

  • Frame Interval: set a start frame and an end frame for your recording

  • Time Interval: set a start time and an end time, in seconds, for your recording

  • Clip Length: attach a Video Player component to synchronize your quilt capture to a video rendering in your scene

7. Bundle your scene into a runtime executable

If you'd like to bundle your scene into an executable rather than generate holograms from within Unity, you just follow your standard Unity build practices - add your scene to the build settings, and press build. It's that simple!

8. Share your Holograms with us!

We're always excited to see what you're making!

So you made all of these amazing 3D scenes in Unity... but how do you export them onto or Looking Glass Studio? We have a handy script to help you with this called Quilt Capture, which is already a component on the Hologram Camera prefab. Scroll down to the Hologram Camera and press the blue "Screenshot" button to capture a still of your scene.

You should be able to fully control the Quilt Recorder from within the editor. If you need to access these settings via script, the Quilt Capture class has public methods to play, pause, resume, and stop the recording, as well as public properties to get and set the start frame, end frame, etc. See our for more details.

If you have any questions, please reach out to us! You can reach the team at Looking Glass Factory at !

Share with us your first Block or quilt recording using Unity, either in the , or by tweeting and tagging

๐Ÿ”Œ
โšก
blocks.glass
API documentation
developer@lookingglassfactory.com
Discord
@lkgglass
Cover

Unity

Create real-time 3D games, apps, and experiences.

Cover

Looking Glass Bridge

The connection between your computer and your Looking Glass.

Cover

Looking Glass Studio

A holographic media player.